Archive | Arts & Crafts RSS feed for this section

Learning to Glue (Mess-free!)

24 Jan

Freestyle has recently been very interested in learning to use scissors and glue after using them at the drop-in school program that we attend. Since they were set out and ready to go, I didn’t do a sit-down formal lesson on scissor use (definitely not necessary to do this for everything a toddler needs to learn, I feel!). I just showed her quickly how to hold them: thumb in the smaller handle hole and her pointer and middle in the wider one (though she is using three fingers right now…is that normal because their fingers are so small? I wonder if I should correct it or let it be for now).

I also made sure she knew how to carry them if she needed to: close the scissors and cover the outside of the blades with your hand, keeping your arm stiff while pointing the handles of the scissors towards the ground. She still needs reminders with this one! It is unsettling to see her walking towards me with them open in her hands!

For gluing, I liked how the Casa students in one of my old schools were taught to use white glue and taught Freestyle that method. I liked how they did it because it was neat and efficient– the child doesn’t end up using gobs of glue and turning their work into a wet and wrinkly mess. I remember when I was a kid, I didn’t like using white glue because it would make the paper wrinkly. When I was in elementary we used  glue sticks more often and I liked how much neater it was, but I do think that white glue is easier (thought messier) for younger kids to use.

So, without much further ado…


How to Neatly Use White Glue for Preschoolers 
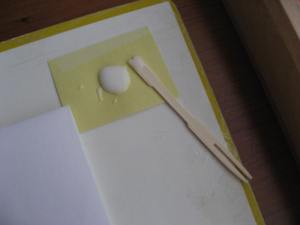
IMG_2644

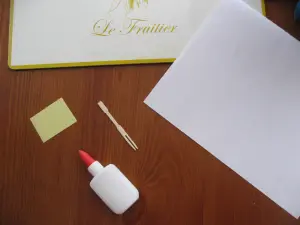
I don’t have any post-its at home right now, so I just used yellow construction paper and tape for show.


Purpose: To learn to glue neatly and efficiently. A skill that will be used over and over for crafts and school projects! Fine motor skills and precision in movement will be used.


Materials:

White glue

Glue mat (an old placemat works well)

Post-it notes

Flat, rounded toothpicks (I couldn’t find any so picked up these bamboo cocktail forks to use for now. They’re large and easy for Freestyle to hold.)

Paper

Cloth (to wipe up glue mat)


What to do:

1. Have all materials ready on a tray . Ask your child bring it to the table.

2. Either have pre-cut paper (or other easy to glue items) ready, or have your child cut up some paper to glue (if she already knows how to use scissors).

3. Set out the glue mat and place the page that she will be gluing things onto on the mat. Stick a post-it onto the top right-hand corner of the mat (or left-hand if she is left-handed!).

4. Show her how to squeeze a small amount of glue onto the post-it. (That’s the beauty of using the post-it…your child will have to learn to only use up the small amount that can fit onto it!)

IMG_2647

5. Show your child how to use the toothpick to take a small amount of glue and dab it onto the corners of the piece of paper that she wants to glue onto the page.

6. Turn the paper around and press the corners onto the page!

7. Repeat!

8. Dispose of toothpick and post-it after the activity. Wipe and dry glue mat before putting it away.


Go further:

Here’s a great post about using glue with preschoolers on the Teach Preschool blog.
 

Threading Activity: Pasta Necklace

20 Dec

A classic kid’s craft, I say! It’s super simple and you can use whatever you have lying around your house– a great I-just-need-you-to-be-doing-something-right-now activity in a pinch! 😉


Making a pasta necklace:

Materials: String, dry pasta, tape, scissors.

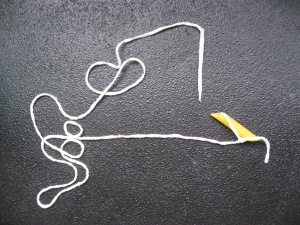
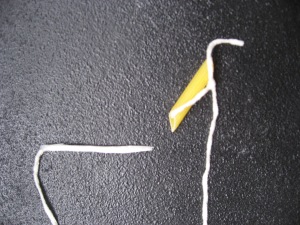
To start, string one pasta (piece of pasta?) and tie a knot.

Use the tape to make a “needle” for easier threading. I found that it works best if the taped part is longer than the pasta.


Threading’s an easy skill to practice in many fun ways! I’ve also written about Threading exercises here and here.

  • Try different types of pasta. You can dye pasta with food colouring or just buy the tri-coloured veggie pasta (yellow, orange, and green).
  • We are going to try small beads next! Maybe I’ll have Freestyle make bead necklaces for her cousins’ Christmas presents or keep that as a ready activity for when kids come over.
  • There are so many toys that let children practice the skill of threading.


DIY Toddler Crayons

18 Oct

Here’s a super easy DIY project that even young children can do (with adult supervision and help with the oven, of course!). It’s also a good way to show them that even “old, used” crayons can be recycled into something brand new! Just keep out a container to collect the small crayons until you have enough.

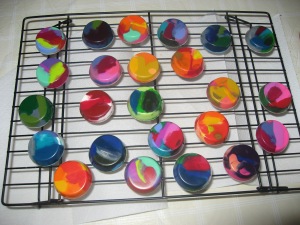
I made these toddler crayons for the loot bags for Freestyle’s 1st birthday. They were colourful and pretty and easy for chubby little hands to grasp! If you have older kids, they still may like them or you could make them as gifts for younger friends, cousins, etc.


DIY Toddler Crayons 


Materials:

  • Old crayons too short to use (or a box of new crayons…I did this because I didn’t have a lot of crayons at that point…man, has that changed!)
  • Mini muffin pan
  • Oven
  • Cooling rack (optional)


What You Do:

1. Preheat the oven to about 275 degrees.


2. Tear off the paper wrapping off the crayons.

I sorted them into colour families because I wanted to make multi-coloured crayons and thought it be easier to mix and match this way.


3. Break up any larger crayons into smaller pieces and then fill the mini muffin tin.


4. Place the tin into the oven for about 10 minutes (or until all the crayons have melted).


5. Now, you can either wait for the crayons to cool or let the tin cool for a few minutes and then put the crayons onto a cooling rack.

Don’t they look so pretty? 🙂


If you are making them as a gift, a head’s up: I would keep them separated and then package them at the last minute because once they start rubbing against one another in a bag/box, they get to be flaky and white (wax). You might even consider separating them with a square of tissue paper.

That’s it! A very simple rainy day project!


Colour Activities!

13 Sep

I can see a rainbow…


Colour Tablets (A Montessori Lesson)

  • Colour Tablets are a Montessori material that introduce children to colours. They are usually used in the Casa classroom (ages 3-6).Here’s a brief explanation (I didn’t know that Dr. Montessori originally used spools of silk!).
  • There are many DIY instructions online (most using paint chips). That link from Living Montessori Now also includes a video showing how to introduce the tablets as well. Love that site! Another simple DIY link here.


Colour Sorting Activities (Easy to DIY)

Colour sorting activities are easy to make using things found around the house.


Make your own Colour Booklet

  • Materials: Colour labels, scissors, glue, index cards, stapler.
  • I just used leftover paper seating cards (I’m a big fan of using whatever I have in the house!) and stapled them together. Then I cut the labels to fit and glued one at the top of each card.
  • We went through a couple of the colours that Freestyle was already familiar with and she named the colour, found the matching crayon, and coloured the card.
  • We’ll continue to do a couple whenever she wants to work on it.
  • It becomes a book to add to your library that she can “read” to us to review the colours. She was very proud to do this!


Colour Collage (our favourite!)


  • Materials: Coloured construction paper, flyers, scissors, glue.
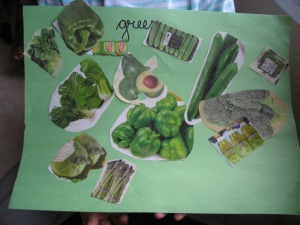
  • Write “green” (or whatever colour you’ve chosen to start with) on the paper. Ask your child to point out green things in the flyers. Cut them out for her and show her how to glue them on the paper.
  • Freestyle learned to use a gluestick, which she LOVED.
  • I would show Freestyle pages with green vegetables and fruit so I could name them for her and talk about healthy food and introduce/review their names.
  • This activity had Freestyle visually isolating the colour green from the rest of the colourful page.
  • I liked that this showed Freestyle that there are different shades of green and pointed out that not everything will always be a solid green colour (introducing ambiguity).
  • I feel that this was her first introduction to using scissors (watching me).
  • For older kids, they can do this activity on their own on a rainy day. You can show them to layer the pictures to make a real collage.

Freestyle truly LOVED this activity!


Simple Summer Fun: Water Painting!

3 Jul

Water Painting

A bucket of water + a paintbrush + a surface + an enthusiastic toddler = simple summer fun! 

Perfect for you neat freak parents out there! 😉 All the fun, none of the mess!

Smock Cafe

21 Jun

That’s Freestyle on the right, playing in the kitchen area.


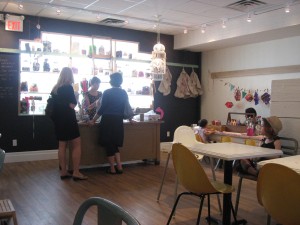
My friend took me and Freestyle to a new kid-friendly cafe. It’s called Smock and it’s located in Toronto, around Roncesvalles & Dundas West.

It’s such a fantastic concept because it allows adults to sit and chat while eating and drinking delicious things while the kids wander and play in the cafe. There was a little kitchen set with a bunch of wooden toys right in the front, little reading nooks hidden by the bench seating, and a marble maze on the wall.

Down in the basement was a small lounge area with more toys and a separate room where a group of moms with young infants had spread out.

There are toys and things to do in every corner, but the best part is the Wonder Workshop.


The Wonder Workshop– my view from the table where I was enjoying a smoothie and chatting with my friend!


At the back of the store they have tons of art and craft supplies and even a facilitator who will help the kids get set up with an art project. It’s great because the kids are busy and you can go sit and relax on the other side of the room.


Freestyle painted two pictures. There were also wooden toys that the kids could choose to paint as well.


It costs $8 for the workshop.

The food and drinks were very yummy. I had a quinoa wrap and a beet salad along with my smoothie. My friend said that her coffee and soup were good too. Budget-wise, think high-end cafe prices. I think I spent about $30 altogether for my drink, Freestyle’s drink, lunch, and the workshop.


I would definitely go again though probably not often due to the distance (not bad if you take the subway– just a short walk from Dundas West station) and the cost. The area is very cute, with tons of little shops along the street. I saw a couple of used book shops (yay!) and a few baby stores.

It would be a nice way to spend a summer afternoon– a little walk and then relax and play at the Smock Cafe!


Thanks, E, for taking us there! We had a great time with you! 🙂

Super Easy (& Super Messy!) Father’s Day Art Cards

12 Jun

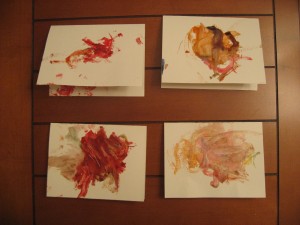
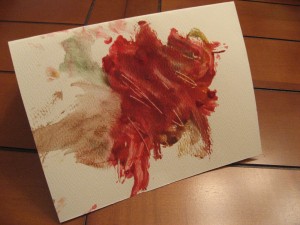
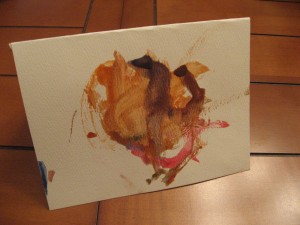
Father’s Day cards made by Freestyle!


I’m not a huge fan of greeting cards. I mean, I like reading the nice messages that people write inside but I just don’t get the fancy $9 cards! They’re some really gorgeous ones but I’d rather put that extra money towards the gift itself!

Usually, I just buy boxes of blank cards on sale and use them for every occasion. Now that I have Freestyle though, I have a personal card maker in the house! It’s a fun art project for her and I think people like getting the handmade cards. They do, right? 🙂


Freestyle really seems to be leaning towards Abstract art…


For Father’s Day I decided to get her some water colour paints and cut up a couple of pages from a water colour art book that I have. She really enjoyed painting (I know this because she pretended to kiss the paint and the paintbrush when she was finished!).

Whenever Freestyle does an art project like painting on a canvas to give as a gift or making these cards, I don’t interfere or try to guide her to choose certain colours or do specific things on it. It always turns out perfectly because it is just her work.*


I think they’re beautiful!


For the cards, I set up the paper and paint on the kitchen floor, added a bit of water to the paint and showed her how to dip the paintbrush to get enough paint to brush onto the paper. Then I let her do her thing while I made dinner next to her. It was messy but fun!

Oh, one thing I didn’t think of was the mess that a toddler will make on a water colour palette. She wasn’t washing her brush after every colour, so they all got mixed up. So just keep that in mind if you try it with a toddler! Of course with an older child, you can teach them to clean their brush whenever they want to use a different colour.


Bring on the mess, I say! As long as Biker’s not at home, at least! 😉


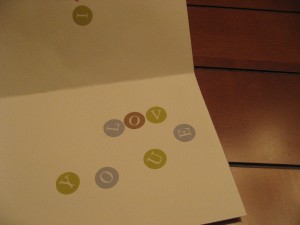
I also bought some alphabet stickers (scrapbooking section) so that Freestyle could “spell” out the names. I would peel them off in order and say the letter name aloud. She would repeat the letter then stick it on the paper (with help to put them in the correct order).


Here we spelled out “Yeh Yeh.” That’s just our way of spelling out the Chinese word for “(Paternal) Grandpa” in English.


This is suppose to read “I love you,” not “I lov youe!”


* Speaking of children’s artwork…

I think kids’ artwork should be just that: the kids’ artwork. Bring on the mess and the chaos! When I was teaching, I always tried to let the students do their own art and holiday crafts. After showing them how to handle the art materials properly and demonstrating the techniques, it was off to the races! I think lopsided, “imperfect” pieces are way better than a perfectly polished craft that you just know an adult had a hand in, right?

During my first year of teaching, I got my Upper Elementary students to do most of their science fair projects during class time. I really wanted to ensure that they did the work themselves because apparantly there was a history of heavy-handed parental involvement in the past. They had a great time (obviously!) and even though on science fair day their display boards were a bit messy compared to the pristine boards of many the Lower Elementary students (who brought their boards home to be finished), I thought it was great because you could tell they really did the work on their own. Okay, I’ll admit I was a bit anxious when I saw all the boards side by side, but I got over it quickly and would just say to the parents, “Isn’t it wonderful how so-and-so did this entire project him/herself?” 🙂

Something from nothing…

15 May

…well, just a bit of flour and oil!

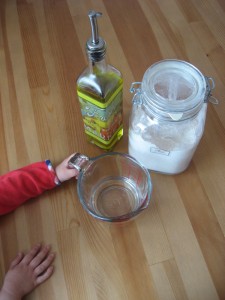
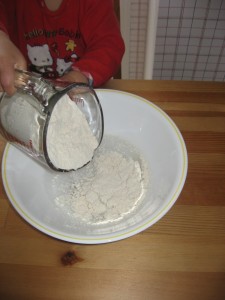
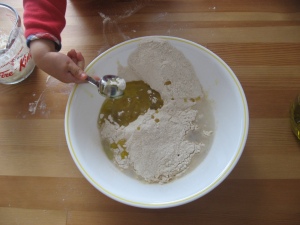
All you need is olive oil, flour, and water! That’s it!

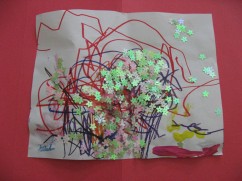
Playdough is such a fun activity for toddlers! It’s a great sensory activity (you can even add glitter or sand to add a different texture to experience). It really is something that will just take a few minutes to make and will provide hours of fun!

I kept forgetting to make some for Freestyle but finally got around to it last week. I wasn’t worried about her eating it because she’s passed that stage (though she did try some mud the other day!), but ended up using a no-salt “edible” recipe because well, I didn’t have any salt left in the house.

I found this no salt playdough recipe from Naturalparentingtips.com.

Freestyle enjoyed helping to make the playdough!

The website said that the olive oil would be nice on your hands as you played, which was true!

Didn’t have any food colouring either, but you can add that too. Just use gloves!

Et voila!

We’re keeping it in an airtight container in the fridge and so far it’s lasted for a week. Today I noticed that the oil was separating a bit at the bottom, but I just kneaded for a minute before giving it to Freestyle and it was fine. It was actually more moist than the day I made it!

Super Easy DIY Birthday Present for a Toddler

17 Feb


It was a bit of a whirlwind of first birthday parties last year. I met quite a few friends from a local playgroup (love this group of women!) and a few of our other friends also had babies around the same time that I did.

Usually, I like to give books as gifts to children (yep, I’m that “auntie”!), but recently I thought of a great (well, I think it’s pretty good, at least!) idea for a friend’s daughter’s first birthday party.

My friend had stated that gifts were not necessary on the invite, but I wanted to at least make something small and useful for her adorable little girl anyway, because we’ve had such a fun year hanging out on our mat leave year.

This girl painted for the first time at our house, so I thought it would be meaningful to make her a yearly art portfolio. This would be a sketchbook for her to draw or paint in each year, so that by the time she’s an adult, she’ll have a neat, all-in-one package of samples of art from every year of her life.

I know that parents accumulate a lot of artwork over the years and that organizing and storing it is a challenge already, so this would be one way to keep some of her art together that would represent each year of her life. I also thought it would be nice for them to look back to see how her art skills have changed and developed over the years. It would be fun for the child to look back on her own progress as well.


How to Make a Yearly Art Portfolio for a 1-Year-Old (or 2, or 3…)

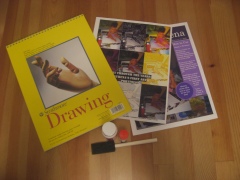
What You’ll Need:

  • A high-quality sketchbook with at least 20 pages
  • Photo(s) of the birthday child for the cover or your own creative spin
  • Instruction page for the inside cover
  • Glue stick
  • Clear glue sealer (i.e. Mod Podge) & brush or sponge
For the cover, you can just do a simple title (“My Yearly Art Portfolio”) with the photo of the child, a photo collage, or decorate it however else you please. I made a cover for the book by using Word Publisher. I had a photo of the bday girl painting at my house and changed the look of each photo to give it an Andy Warholish feel. I used the Mod Podge to seal and protect it…because I’m assuming that it will be saved and treasured as one of her most prized possessions for years to come! Ha!


On the inside cover, I used a photo I took of the child painting with her mom and just included a message to explain how the yearly art portfolio works:


My First Art Portfolio

(Child’s name, date)

How to Use

Happy 1st Birthday!

This is a yearly art portfolio for showcasing your (future) masterpieces created during your life as an artist. 

Every year, draw or paint a beautiful picture on one of the pages. Don’t forget to sign and date your art!

You’ll have a great keepsake of your artwork throughout the years to look back on and enjoy! 

Love from, 

MM, Biker, & Freestyle 

What I like about this gift is that it’s budget-friendly. Depending on your budget and the child’s age, you can include one or a combination of the following art materials/accessories: crayons, pencil crayons, watercolour set, paintbrushes (shorter, thicker ones for toddlers), art smock, non-toxic paints/fingerpaints, etc.

Et voila! A very simple, inexpensive, and useful gift that will (hopefully!) be enjoyed for years to come!